- Product Details
- Specifications & Installation
Product Technical Details
Modern Koncrete Designs
Our belief is simple, what you image, Modern Koncrete Designs creates. Our success is due to our artisan's expertise, mold making magic, and rigorously tested blend of our Ultra High performance Light Weight Flex Koncrete.
Driven by innovation and the beauty of nature, Modern Koncrete Designs reimagines the world of concrete with the introduction of our Ultra High-Performance Light Weight Flex Koncrete manufacturing capabilities. Modern Koncrete Designs revolutionary product flexes and is 60% less weight than ceramic tile products. In every designed product is crack and impact resistant and has sustainability that has evolved the design potential of this industrial material like never.
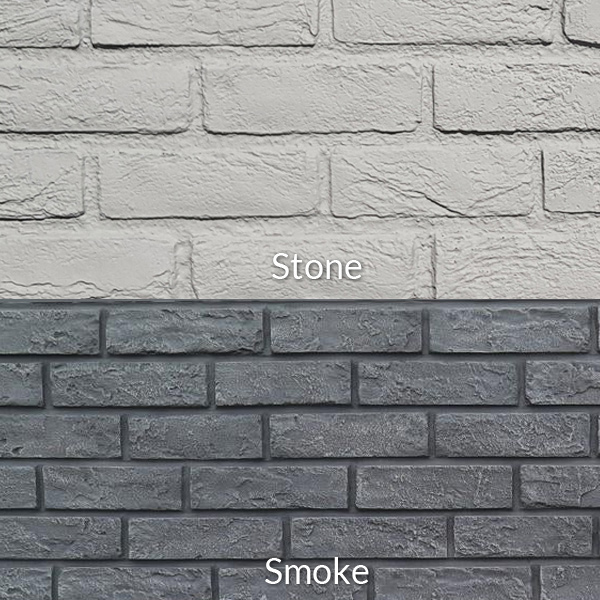
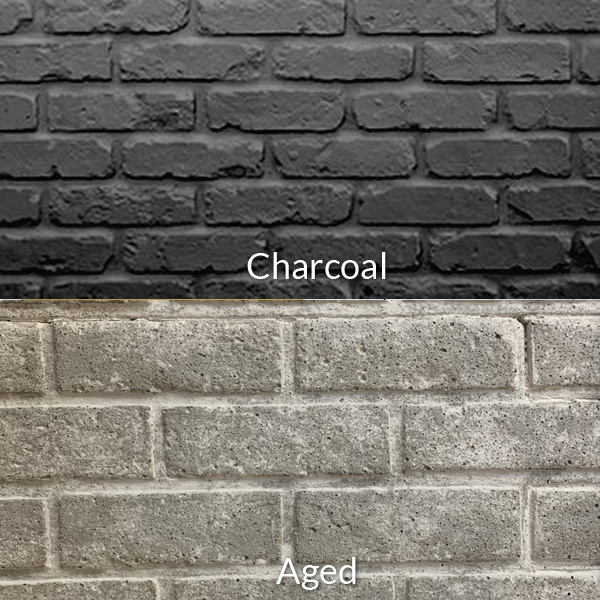
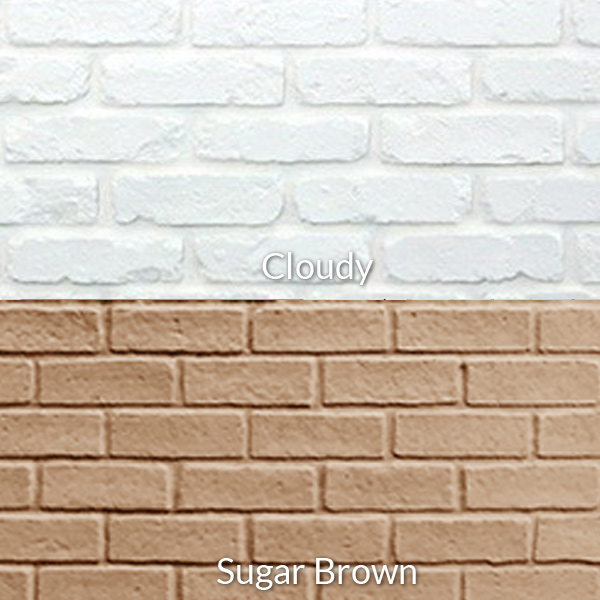
Modern Koncrete Design Stock Colors are formulated in the blend to provide long lasting fade resistance to the elements. Our custom color blends are also formulated within our blend and a top finish blend of concrete mineral stain is added to the surface to enhance our grained texture look. Modern Koncrete Designs provides a quality sealer and has finish upgrade options for our wear, scratch and stain resistant finishes to provide an enhanced look to our Koncrete product designs.
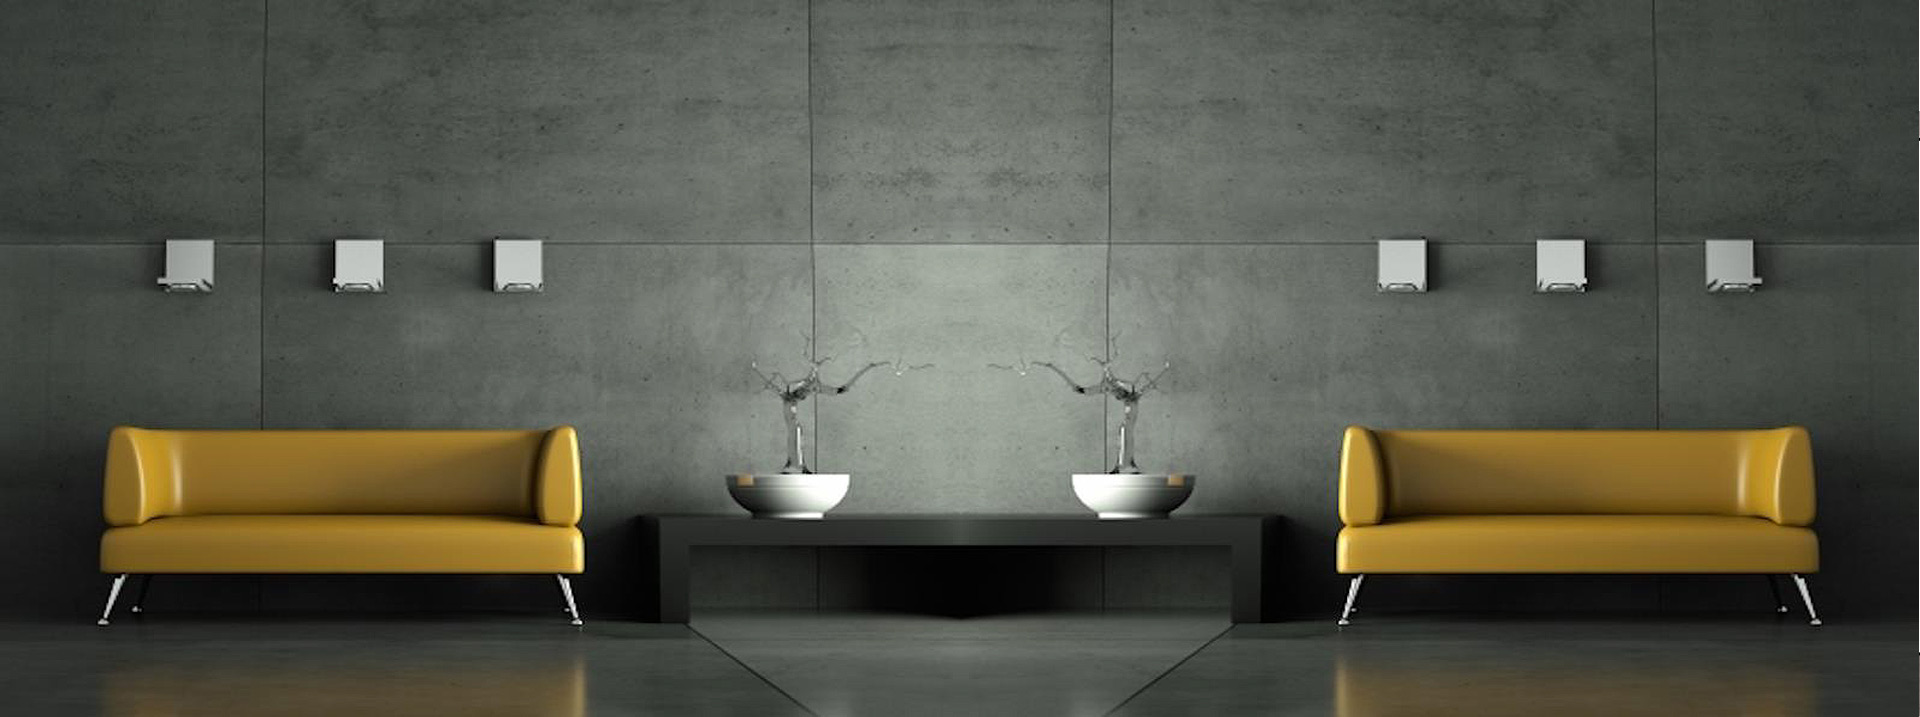
Modern Koncrete Design products are not only more elegant in achieving natural visuals and textures but are also more impact resistant, flexible and forgiving with the daily wear and tear in larger format specifications. With precision casting and hand-finishing, a Modern Koncrete Design products are assured its lasting quality, beauty, natural variation and authenticity are unmatched - an industrial luxury element without equal.
TECHNICAL
At Modern Koncrete Designs our belief is simple, what you image, Modern Koncrete Designs creates. Our success is due to our artisan's expertise, mold making magic, and rigorously tested blend of our Ultra High performance Light Weight Flex Koncrete.
Ultra High Performance Material:
• UHPC (Ultra High performance concrete)
• Concrete densifier and VOC free sealer
• Signature color pigments
• Glass Fiber Mesh
• Panels are extremely stable and will not expand or shrink over time
• Four times as strong as traditional precast concrete
• Does not have the capillary pores of traditional precast
• Does not absorb water and degrade in demanding freeze/thaw weather. More ecological than traditional precast because of the type of cementMaterial to Testing
Ultra High Performance Material:
Technical:
• Compressive Strength: 8,600.psi
• Flexural Strength: 750psi
• Water Absorption: less than 3%
• Freeze Thaw: < 3% weigh loss. 1000 cycles
• Moisture absorption exceed UBC standard
• Wind resistance 110 MPH. ASTM E330 02
• Shear bond: > 1000 psi
• Fire Rating: ASTM E 84 Zero flame spread & zero smoke developed
Specifications
|
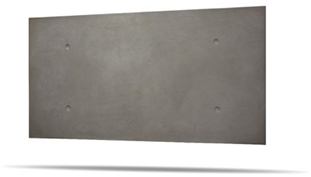
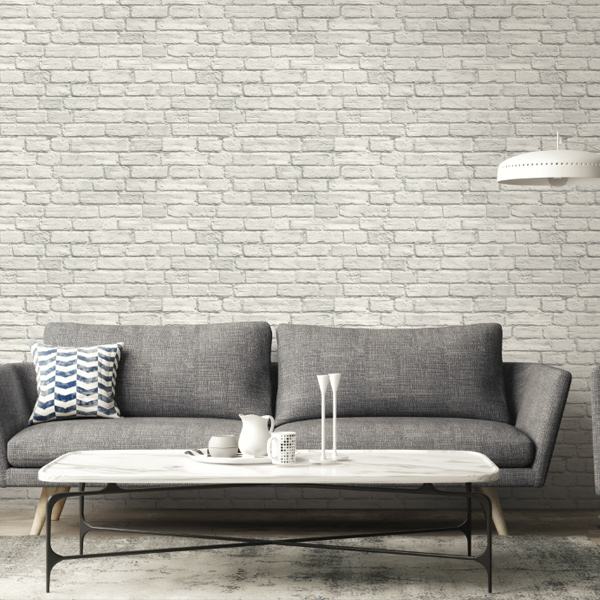
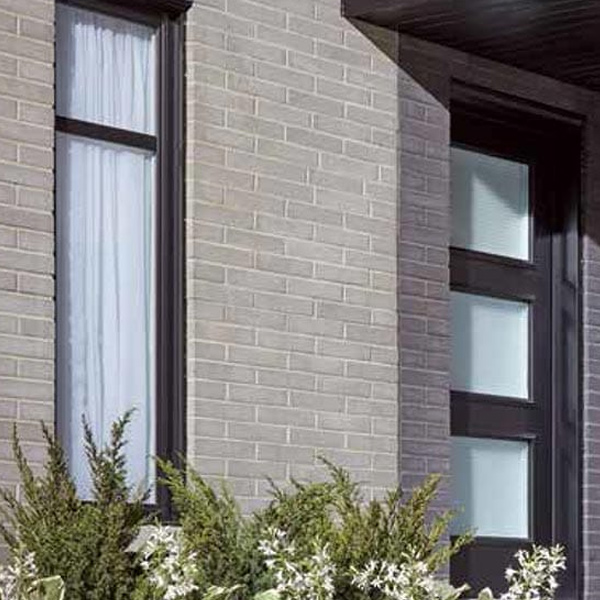
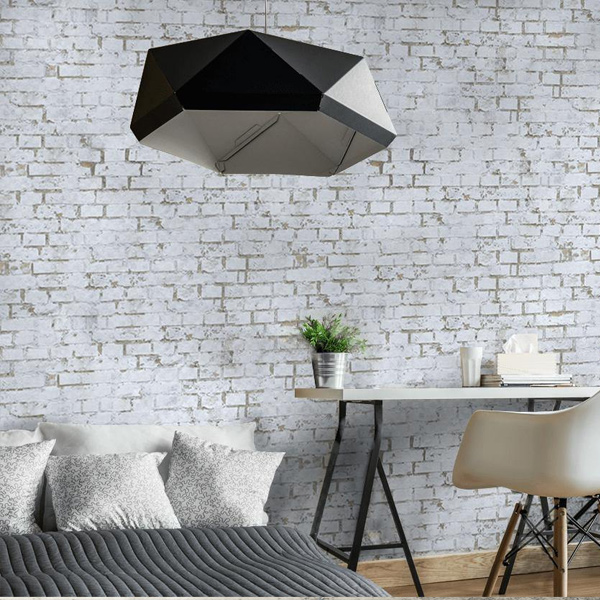
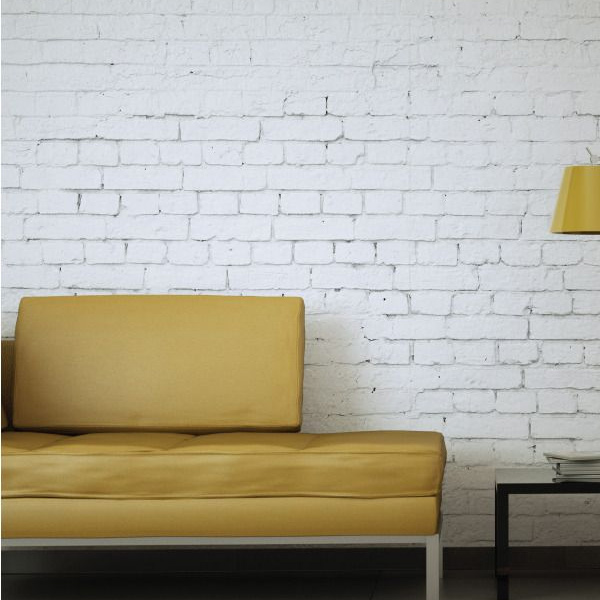
Every piece of Modern Koncrete Designs Slab is hand-cast to achieve a truly cast-in-place concrete look. Our lightweight fiber- reinforced concrete is fireproof, specially treated to resist stains, and is very strong and even flexible to allow for an easy to install and years of maintenance-free beauty.
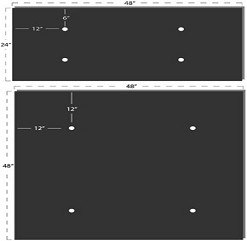
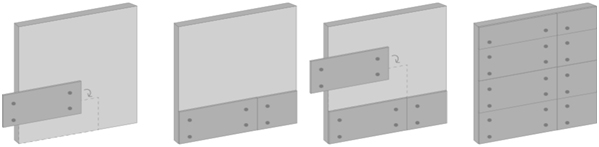
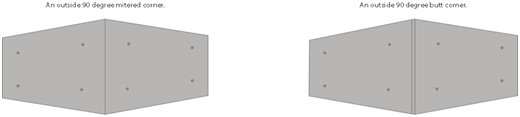
Thickness Stock Colors Wall Panel Finish Wall Panel Texture Eyelet Special Order Color Applications WALL PANEL DESIGNS |
|||||||||||||||||||||||||||||||||||||||||
|
Product Fiber-Reinforced Lightweight Concrete (silica free) FLAMESPREAD:N/A SMOKE DEVELOPED:N/A
Slab Info:
Slab Properties:
Box and Pallet Dimensions
Advantages
Slab Recommended Finishing Products The following products are recommended with Modern Koncrete Designs products. See install instructions for details on how/when to use.
LimitationsModern Koncrete Designs products do not add to the structural load bearing capacity of the substrate to which it is being applied. All products have been designed for wall installation only and should not be applied anywhere that they will be walked or sat on. Modern Koncrete Designs has not been tested for under-water.
Slab Care and CleaningBecause of the high-grade coating formulation used, Modern Koncrete Designs products are easily cleaned with a water and a cloth. Wherever possible, do not use anything rough, chemicals, or anything acidic to clean. This could damage the surface. Some tougher debris/stains can be eliminated with water and a light brushing with a soft bristle brush, and even some less harsh cleaning agents. Always trial a small area first to ensure the procedure is working, and to check for colorfastness.
Modern Koncrete Designs comes standard with DuraCoator equivalent penetrating sealant applied. Unless the boards are being utilized where not recommended, additional sealing is not necessary. If extra sealant is desired for your particular use, make sure it is compatible by testing a small area, or contacting Modern Koncrete Designs. Sealers may darken the color of the wood, and usually add different degrees of shine as well.
Modern Koncrete Designs WarrantySubject to the terms, conditions, and limitations stated in our full Warranty, Modern Koncrete Designs provides this limited warranty only to the person or entity that originally purchased (the “Original Purchaser”) any Modern Koncrete Designs panel (the "Product") from Modern Koncrete Designs.Modern Koncrete Designs warrants that the Product will not have peeling, excessive cracking, flaking, or corrosion solely as a resultof defects in materials or workmanship (the “Warranty”) for a period of five (20) years full warranty from theoriginal date of purchase (the “Warranty Period”). Some of the above issues may occur if the product is installed in a fashion or environment not recommended by Modern Koncrete Designs. |
|||||||||||||||||||||||||||||||||||||||||
IMPORTANTThe following installation instructions must be followed for warranty purposes and for optimal performance. Modern Koncrete Designs does not install panels or have control over the installation of the panels;therefore, these Installation Instructions are to be used as guidelines. It is the responsibility of the installer to ensure all products are installed in accordance with these Modern Koncrete Designs Installation Instructions. Modern Koncrete Designs assumes no liability for improper installation or personal injury resulting from proper or improper use or installation.
SAFETY FIRSTThe operator of any power tools or other tools should be skilled and familiar with the correct use of each tool. Proper safety gear must always be worn.
BUILDING CODEFollow local Building Codes when applying Modern Koncrete Designs. It is the responsibility of the installer to ensure that applicable building codes are met or exceeded.
PRODUCT COLORING:Modern Koncrete Designs is a natural concrete product, and some color variation is inevitable (and usually desirable). Please ensure, wherever possible, that the production dates on all products being installed side-by-side are the same or compatible. This will help ensure consistent coloring. Most of the time product from different dates will match up, but the installer should check this before installing. Also, there is the possibility for a panel to be slightly off colored in a batch. Again, the installer should check all panels match before installing.
|
|||||||||||||||||||||||||||||||||||||||||